
Awesome. Let’s talk on Custom Post Type (CPT). This will also help you if have below questions:
- How to Create Custom Post Types in WordPress?
- Generate WordPress Post Type
- Create your first WordPress Custom Post Type
- WordPress CPT taxonomy
- Complete guide to WordPress Custom Post Types
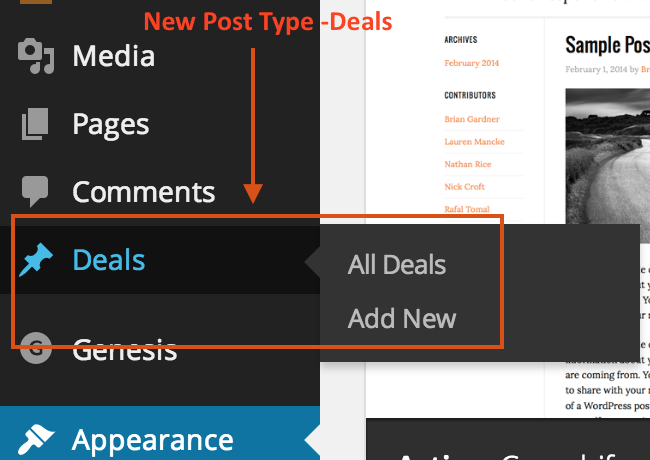
WordPress is one of the most widely used blogging platform with lots of powerful features and Custom Post Type is one of them. I’ve never looked at Custom Post Type (CPT) in WordPress before but recently I wanted to create a new section for “Deals“.
There are two ways you could achieve that:
- Create new subdomain:
http://deals.crunchify.com/ - Create new Custom Post Type:
https://crunchify.com/deals/
To achieve point 1 you could simply create a subdomain and install new WordPress installation and start new blog. But I believe, nobody wants to do that to just create one simple section. So, we will take a look at point 2 in this tutorial.
WordPress has bunch of Post Types which are default, like:
- Attachment (Post Type: ‘attachment’)
- Post (Post Type: ‘post’)
- Navigation menu (Post Type: ‘nav_menu_item’)
- Revision (Post Type: ‘revision’)
- Page (Post Type: ‘page’)
Now what is CPT?
Custom post types (CPT) are new post types you can create. A custom post type can be added to WordPress via the register_post_type() function. This function allows you to define a new post type by its labels, supported features, availability and other specifics.
Let’s get started.
Step-1
Here is a what we need to create new Custom Post Type called “Deals“.
// Creating a Deals Custom Post Type
function crunchify_deals_custom_post_type() {
        $labels = array(
                'name'                => __( 'Deals' ),
                'singular_name'       => __( 'Deal'),
                'menu_name'           => __( 'Deals'),
                'parent_item_colon'   => __( 'Parent Deal'),
                'all_items'           => __( 'All Deals'),
                'view_item'           => __( 'View Deal'),
                'add_new_item'        => __( 'Add New Deal'),
                'add_new'             => __( 'Add New'),
                'edit_item'           => __( 'Edit Deal'),
                'update_item'         => __( 'Update Deal'),
                'search_items'        => __( 'Search Deal'),
                'not_found'           => __( 'Not Found'),
                'not_found_in_trash'  => __( 'Not found in Trash')
        );
        $args = array(
                'label'               => __( 'deals'),
                'description'         => __( 'Best Crunchify Deals'),
                'labels'              => $labels,
                'supports'            => array( 'title', 'editor', 'excerpt', 'author', 'thumbnail', 'revisions', 'custom-fields'),
                'public'              => true,
                'hierarchical'        => false,
                'show_ui'             => true,
                'show_in_menu'        => true,
                'show_in_nav_menus'   => true,
                'show_in_admin_bar'   => true,
                'has_archive'         => true,
                'can_export'          => true,
                'exclude_from_search' => false,
                'yarpp_support'       => true,
                'taxonomies'          => array('post_tag'),
                'publicly_queryable'  => true,
                'capability_type'     => 'page'
);
        register_post_type( 'deals', $args );
}
add_action( 'init', 'crunchify_deals_custom_post_type', 0 );
Above code will create new section called Deals which we call Custom Post Type 
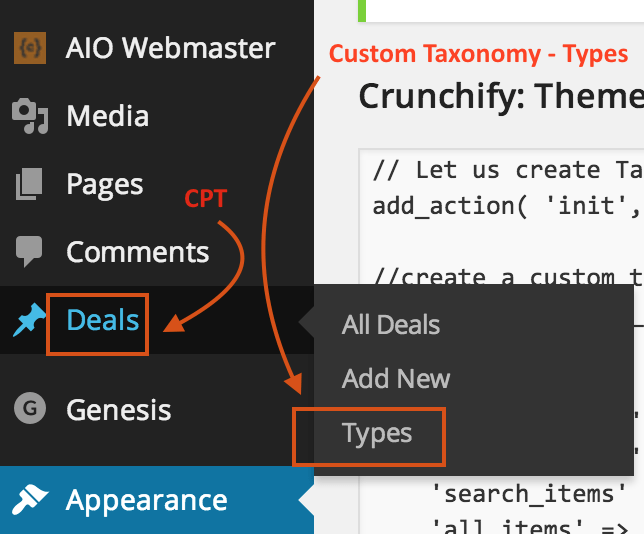
How to Add Tags to Custom Post Type?
'taxonomies' => array('post_tag')line in above snippet will add standard WordPress tags to your Custom Post Types.
Step-2
Now what if you want to create Custom Taxonomy named Type. With register_taxonomy function you could simply create taxonomy.
// Let us create Taxonomy for Custom Post Type
add_action( 'init', 'crunchify_create_deals_custom_taxonomy', 0 );

//create a custom taxonomy name it "type" for your posts
function crunchify_create_deals_custom_taxonomy() {

  $labels = array(
    'name' => _x( 'Types', 'taxonomy general name' ),
    'singular_name' => _x( 'Type', 'taxonomy singular name' ),
    'search_items' =>  __( 'Search Types' ),
    'all_items' => __( 'All Types' ),
    'parent_item' => __( 'Parent Type' ),
    'parent_item_colon' => __( 'Parent Type:' ),
    'edit_item' => __( 'Edit Type' ),
    'update_item' => __( 'Update Type' ),
    'add_new_item' => __( 'Add New Type' ),
    'new_item_name' => __( 'New Type Name' ),
    'menu_name' => __( 'Types' ),
  );

  register_taxonomy('types',array('deals'), array(
    'hierarchical' => true,
    'labels' => $labels,
    'show_ui' => true,
    'show_admin_column' => true,
    'query_var' => true,
    'rewrite' => array( 'slug' => 'type' ),
  ));
}
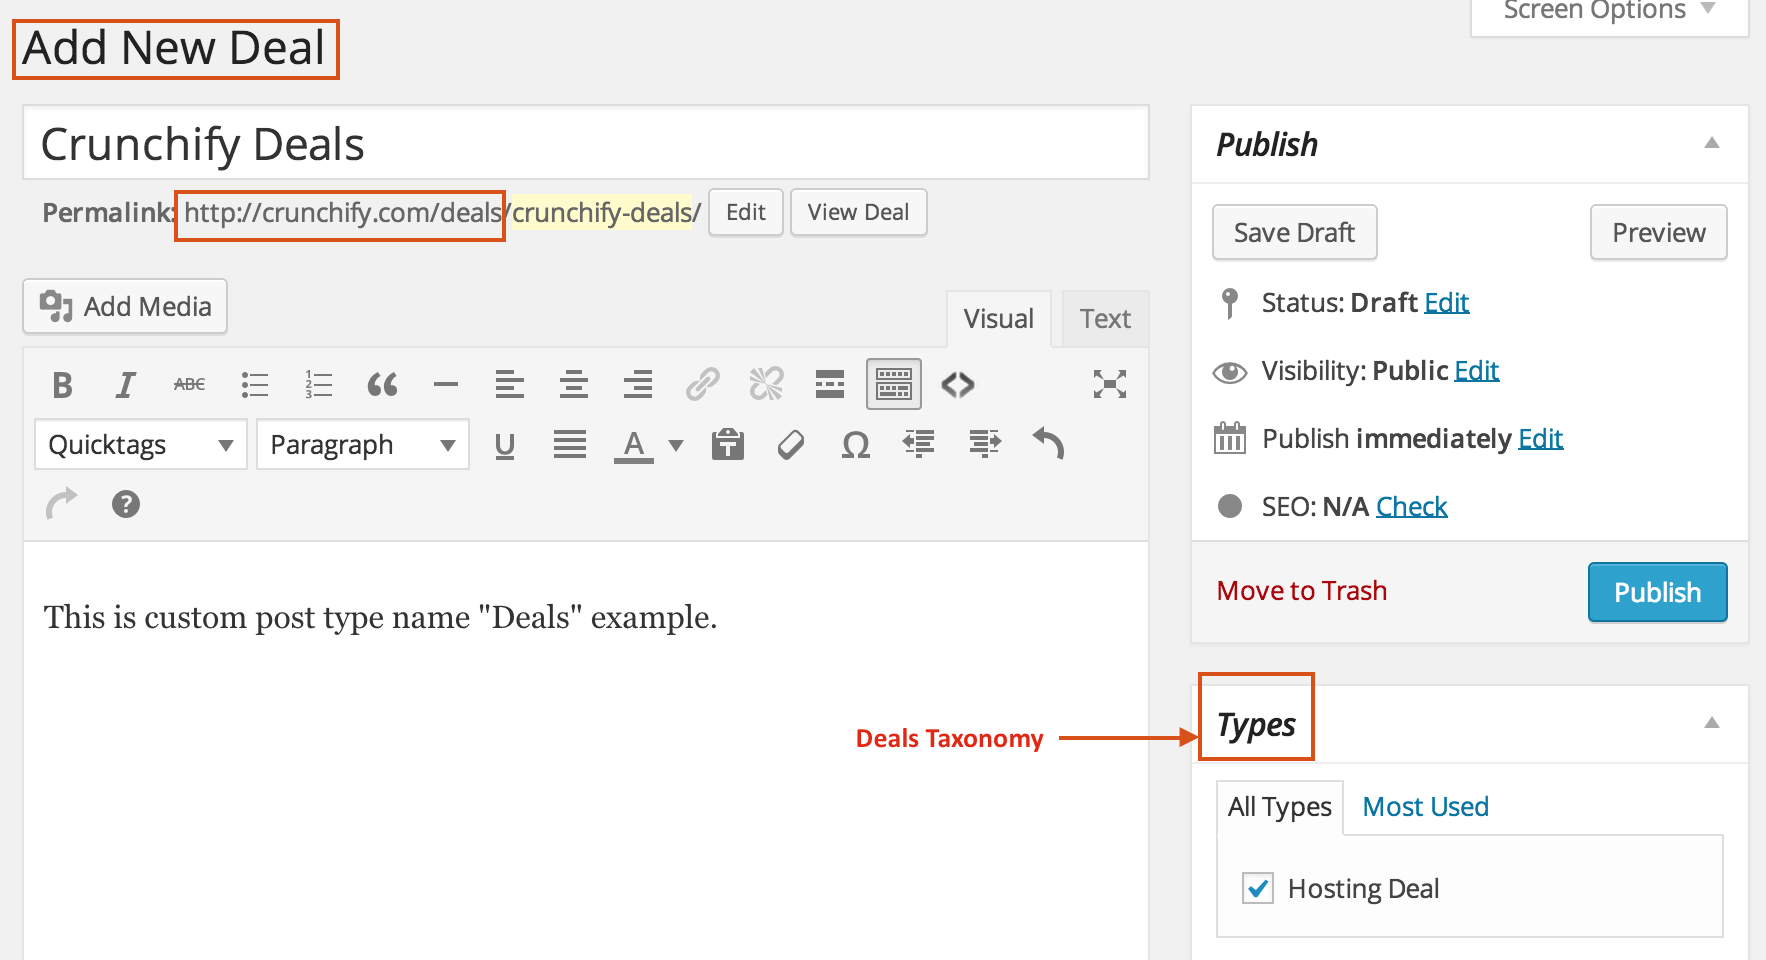
Step-3
Now create your first deals post. Here is a Add New Deal screenshot.
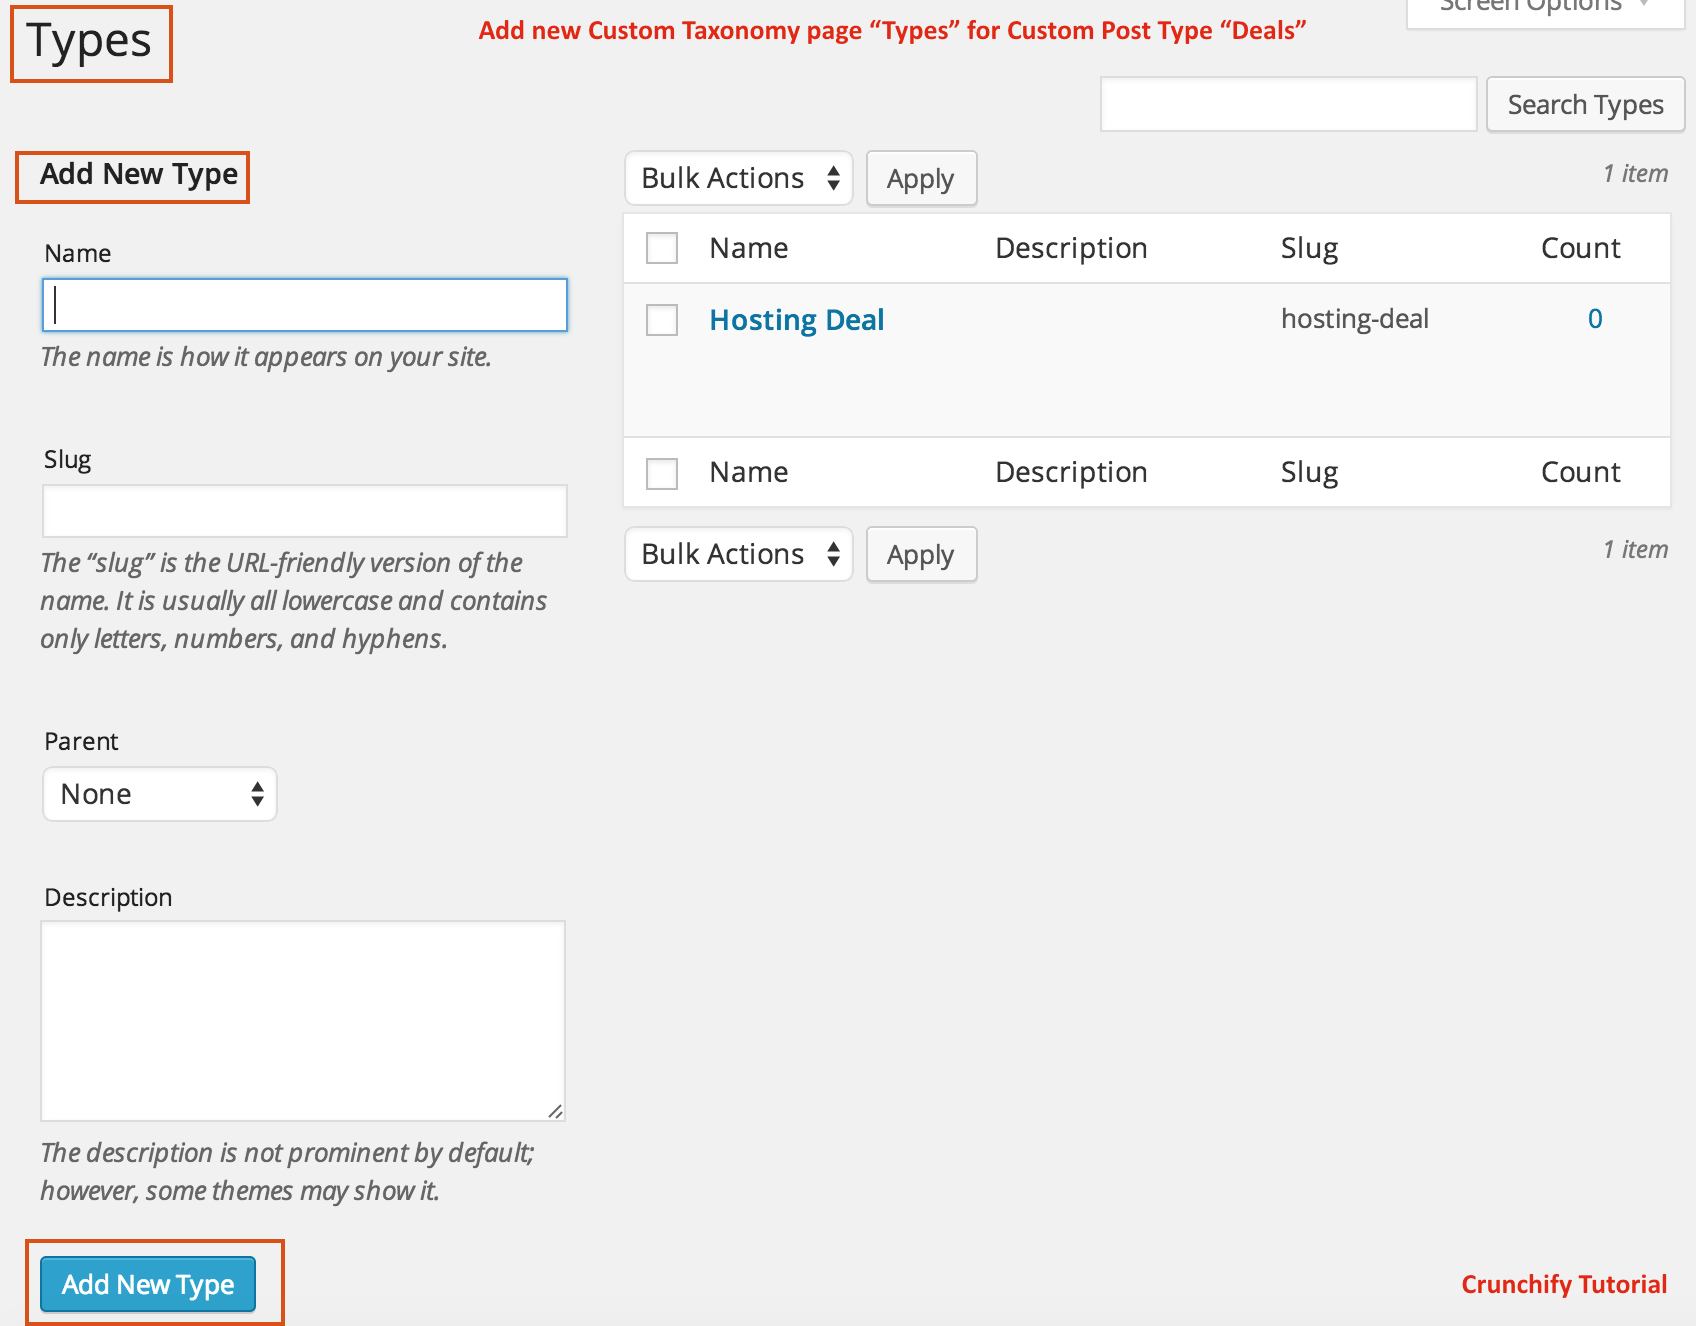
Step-4
Create your first Types taxonomy. Here is a Add New Type page.
We have created WordPress Custom Post Type - Deals and Custom Taxonomy - Types using this tutorial. In next tutorial will cover some more customization on this.
What next? Get WordPress Custom Post Type (CPT) Tips and Tricks for RSS, YARPP, Post Meta, Footer, HomePage.
Also, checkout another tutorial on CPT.
Let me know if you face any issue running above WordPress Code.
The post How to Create WordPress Custom Post Type (CPT) and Taxonomy – Hello World Tutorial, Tips and Tricks appeared first on Crunchify.


0 Commentaires